


|
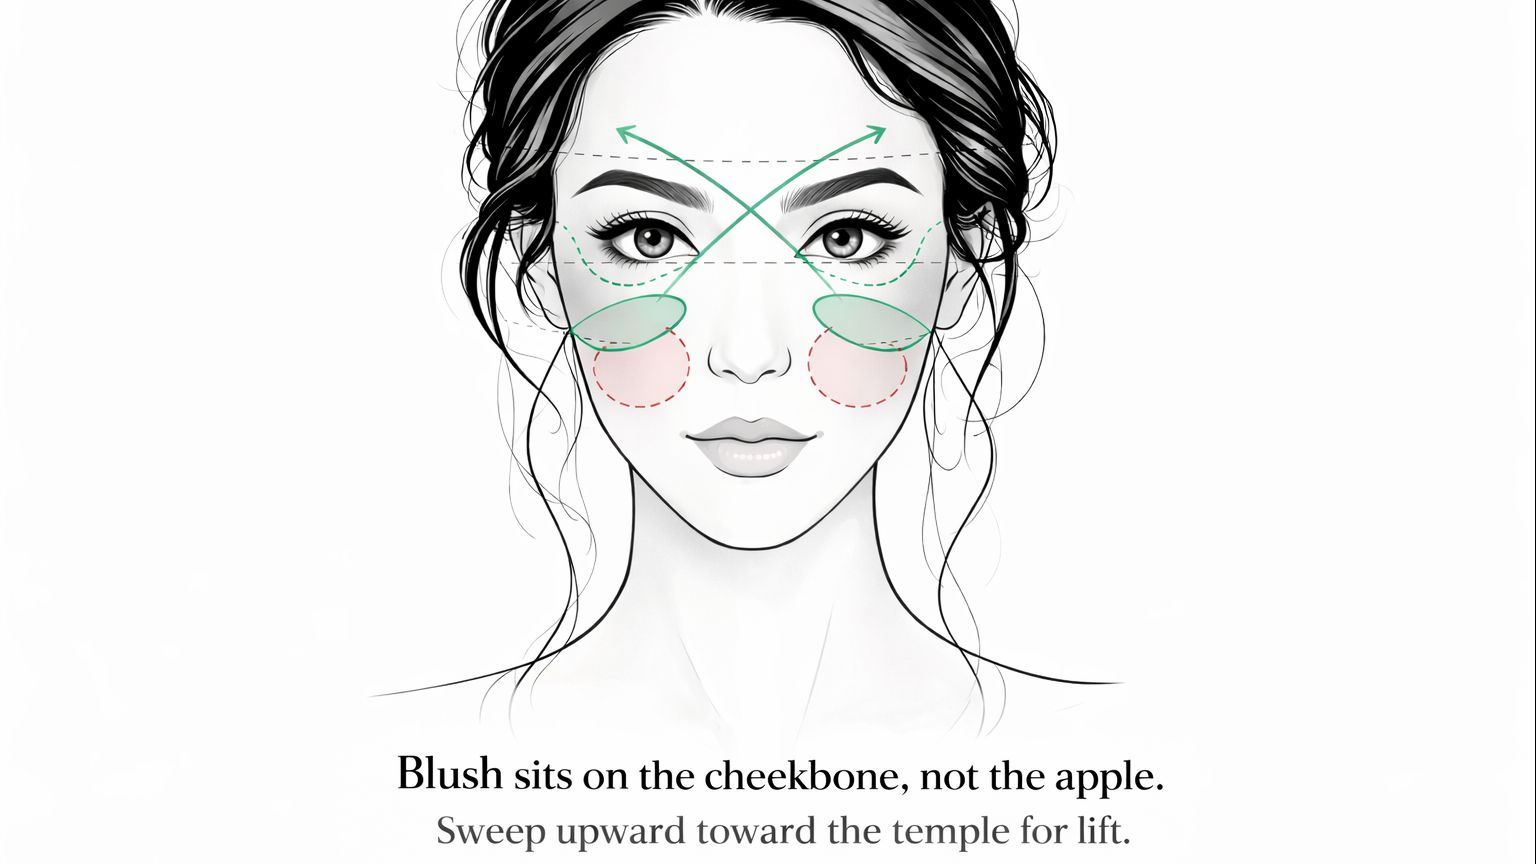
Step 1: Start at the cheekbone, not the apple. The apple is the fullest part of the cheek. Color placed there adds roundness. Color placed on the cheekbone itself, directly under the outer corner of the eye, adds structure. Start here on every look before deciding whether you need anything else. Sweep upward and outward toward the hairline in one motion, following the natural line of the bone. |
|
|
The 962 Slanted Blusher is built for this stroke. Its angled bristles align with the cheekbone and direct product upward in a single sweep rather than depositing it in a concentrated circle. Load lightly, tap off the excess, and let the angle of the brush do the directional work. |
|
Step 2: Extend toward the temple for a lifted effect. Once the cheekbone is placed, take the same color slightly further, into the temple area. This is the technique behind what is being called blush draping right now, and it is having a major moment for good reason. Color that reaches the temple creates the illusion of a lifted, longer face without any contour. Keep it sheer. The temple should look flushed, not painted. |
|
Switch to the 965 Duo Fibre Blusher for this step. The duo fibre construction picks up significantly less product than a standard blusher, which is exactly what the temple area needs. A heavy hand here overwhelms. The 965 naturally keeps the application light and buildable so the color reads as a flush rather than a stripe. |
|
Step 3: Try a touch under the eye for a spring-specific finish. This one is optional but worth trying. A small amount of blush placed just below the lower lash line, where the top of the cheek meets the undereye area, creates a soft, flushed effect that reads as naturally healthy. It is rooted in K-beauty and has crossed into editorial and everyday looks in 2026. Use a shade lighter than your cheek color or the same shade at a fraction of the intensity. |
|
The 960 Precision Blusher is the right tool here. Its tapered dome concentrates product in a small, targeted area without spreading it onto the undereye skin above or the mid-cheek below. One or two light taps is all it takes. The tapered tip gives you control that a larger brush cannot. |
|
Why It Works: Blush placed low pulls the eye downward and adds weight to the center of the face. Blush placed high along the bone and toward the temple pulls the eye upward and creates the appearance of lift without a single contour product. The brush shapes matter because each placement zone requires a different footprint and a different amount of product. The 962 sweeps, the 965 sheers out, and the 960 pinpoints. Together they give you a complete, modern blush application that works with the structure of the face rather than sitting on top of it. |
|
The 962 Slanted Blusher, 965 Duo Fibre Blusher, and 960 Precision Blusher are all you need to make this work. |
|
As always, we appreciate your support and value your feedback. Stay tuned for more tips, tricks, and product highlights from Bdellium Tools. From all of us at Bdellium Tools, best wishes! 💛 |
|
|


